Quick Start
Once apio has been installed and the drivers have been correctly configured is time to start playing with your FPGA!
Install packages
$ apio install --all
Create a project
Go to your project’s directory or try the examples
$ apio examples -d leds
$ cd leds
Configure your board
Find your board in the list
$ apio boards --list

Supported boards:

----------------------------------------------------------
Board            FPGA                 Type  Size  Pack
----------------------------------------------------------
Cat-board        iCE40-HX8K-CT256     hx    8k    ct256
TinyFPGA-B2      iCE40-LP8K-CM81      lp    8k    cm81
TinyFPGA-BX      iCE40-LP8K-CM81      lp    8k    cm81
alhambra-ii      iCE40-HX4K-TQ144     hx    8k    tq144:4k
blackice         iCE40-HX4K-TQ144     hx    8k    tq144:4k
blackice-ii      iCE40-HX4K-TQ144     hx    8k    tq144:4k
fpga101          iCE40-UP5K-SG48      up    5k    sg48
go-board         iCE40-HX1K-VQ100     hx    1k    vq100
iCE40-HX8K       iCE40-HX8K-CT256     hx    8k    ct256
iCE40-UP5K       iCE40-UP5K-SG48      up    5k    sg48
iCEBreaker       iCE40-UP5K-SG48      up    5k    sg48
iCEBreaker-bitsy iCE40-UP5K-SG48      up    5k    sg48
iceblink40-hx1k  iCE40-HX1K-VQ100     hx    1k    vq100
icestick         iCE40-HX1K-TQ144     hx    1k    tq144
icezum           iCE40-HX1K-TQ144     hx    1k    tq144
icoboard         iCE40-HX8K-CT256     hx    8k    ct256
kefir            iCE40-HX4K-TQ144     hx    8k    tq144:4k
upduino          iCE40-UP5K-SG48      up    5k    sg48
upduino2         iCE40-UP5K-SG48      up    5k    sg48
Create an apio.ini file with your board
$ apio init --board icestick
Process the project
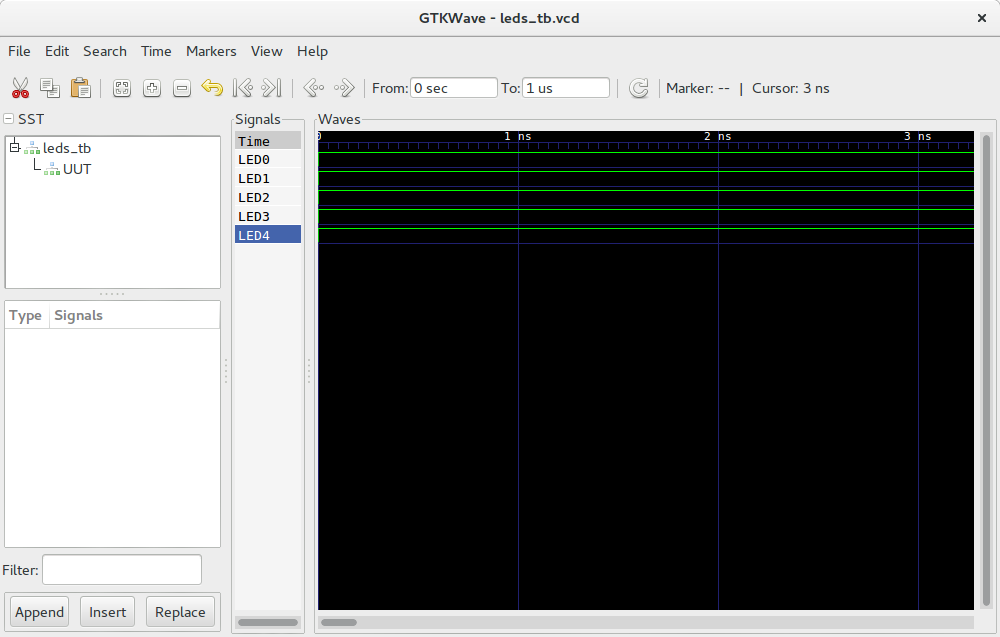
Simulate
Simulate your test bench using Icarus Verilog and GTKWave
$ apio sim
Note
GTKWave must be installed.
| Debian | apt-get install gtkwave |
| Mac OSX | brew install gtkwave |
| Windows | apio install gtkwave |
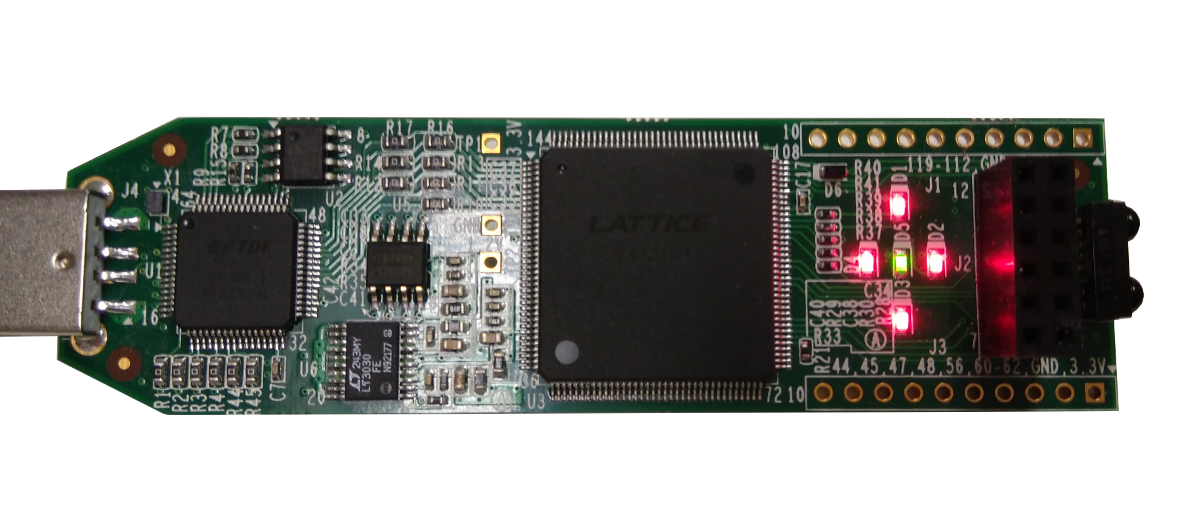
Upload
Connect your FPGA board and upload the bitstream using Icestorm Tools
$ apio upload
All the leds should turn on after 3 seconds
Congrats! Now You have your fully open source FPGA toolchain ready!